We often deal with multilingual Sage X3 customers that choose to make use of the program in their native languages. As an outcome, the program might periodically misinterpret the info or lose it.
To use customized translations Sage X3 provides us numerous strategies for dealing with different areas, such as screens, tables, descriptions, and so on separately. We’ll show one such method for equating the title of a menu product.
New Things: Download sales billing information in JSON format through Sage X3
To do the translation procedure, follow the actions listed below:
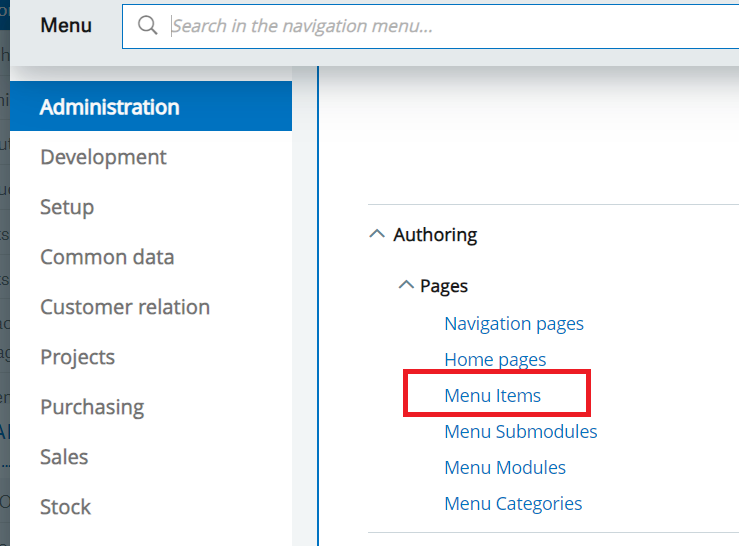
Menu Product: All > > Administration > > Authoring > > Pages > > Menu Product
Refer the screenshots for referral:
– Very first browse to Menu Products from the application’s Navigation page by following the pointed out course as displayed in Fig. 1.
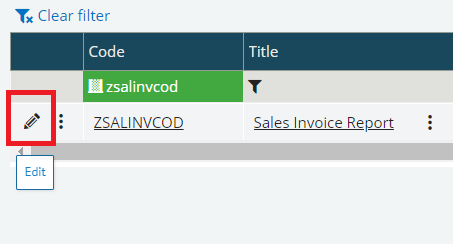
We currently have a menu product with the title “Sales invoice report” which was produced for ENG– United States language. We’ll include our translation for ENG– BRI language as “Tax billing report” for which we’ll enter into edit mode by click the Pen icon as displayed in Fig. 2.
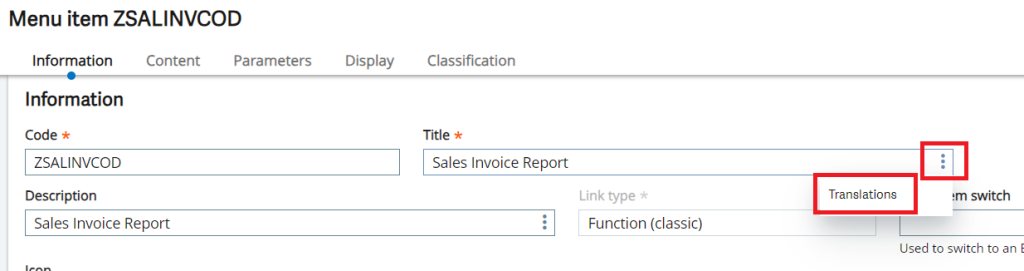
In the edit mode, click the 3 dots beside the Title field to get the translation choice as displayed in Fig. 3, this is where Sage X3 provides us the choice to deal with translation for menu product titles.
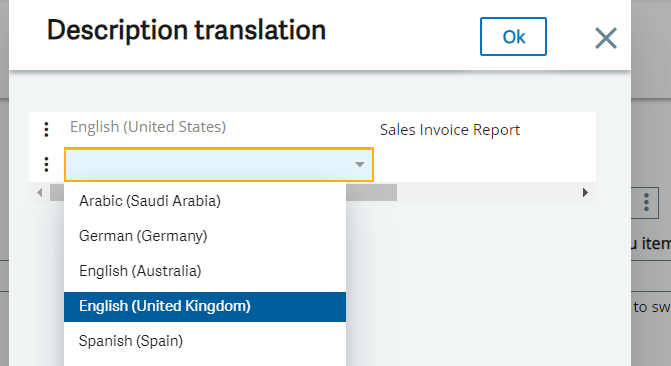
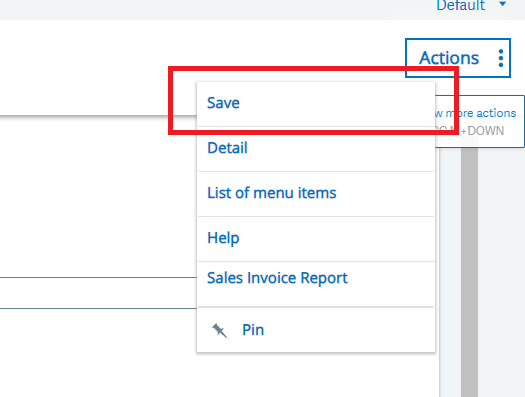
– In the pop-up window we can see that presently there is translation just for ENG– United States language, so we’ll pick our language in the next row and include the preferred description as displayed in Fig. 4 and click OK. Lastly to end our adjustment we’ll click the Action button and struck the Save button as displayed in Fig. 5.
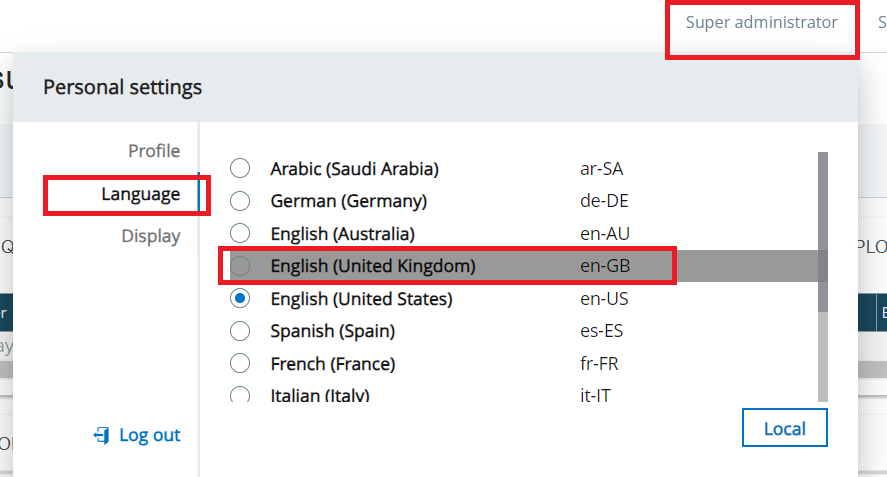
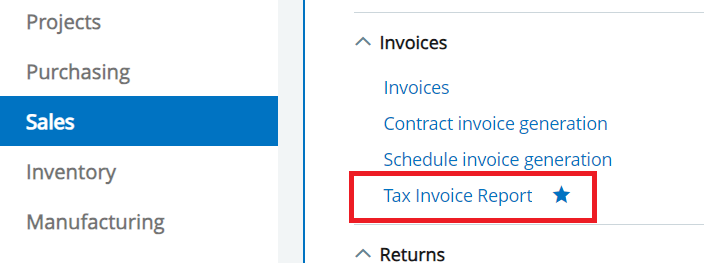
Now all we require to do is carry out a fast relogin of the application and alter the Application language to ENG– BRI as displayed in Fig. 6 and after that validate our menu product on the module/sub-module as displayed in Fig. 7
In this manner we can utilize the translation procedure in Sage X3 to set preferred translations for menu products.